


Table of Contents
ToggleWhether you’re booting up Call of Duty Warzone for the first time or just tired of getting eliminated in the first minute, this guide breaks down everything you need to know to actually survive and compete. Warzone has evolved significantly since its 2020 launch, and if you haven’t played in a while, the game feels completely different. Gun balance shifts, new map sections, operator changes, and refined mechanics mean veterans need fresh perspectives and newcomers need a solid foundation. This guide covers the essentials, from dropping in and looting to gunplay, positioning, and team communication, without the fluff or condescension. You’ll learn what actually matters and where to focus your first 50 hours to stop being the teammate everyone mutes.
Key Takeaways
- To play Call of Duty Warzone effectively, prioritize landing at medium-tier locations to practice looting and gunplay safely before advancing to contested hot zones.
- Securing a loadout token early is essential, as custom weapon builds with proper attachments dramatically outperform ground loot and determine gunfight outcomes.
- Positioning and cover management matter more than raw aiming skill—a mediocre player with good position beats an excellent aimer with poor positioning almost every time.
- Communication through pings and specific verbal callouts (including enemy count, weapon type, and exact location) is non-negotiable for squad coordination and winning matches.
- Master armor plate management by staying in cover, pre-aiming enemy head positions, and rotating proactively into safe zones rather than panic-rushing when gas approaches.
- Stick to the same squad, weapons, and landing spots until they become automatic, allowing muscle memory and game sense to develop faster than constantly switching strategies.
Understanding The Basics Of Warzone
Warzone is a free-to-play battle royale mode within the broader Call of Duty ecosystem. You land on a map with up to 150 players (depending on the playlist), scavenge for weapons and equipment, and fight until only one squad remains. The core loop is straightforward: land, loot, engage, survive. But execution is where skill separates top performers from the rest.
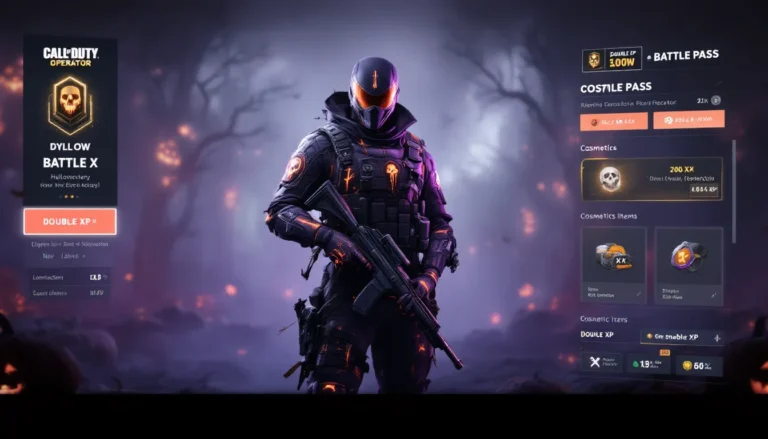
The map is divided into named locations and landmarks, each with unique loot spawns, choke points, and building layouts. Every match, a toxic gas circle shrinks the play area, forcing survivors closer together. You’ve got a loadout system separate from ground loot, which means you can customize specific weapon builds before each match. Your operator, the character model you play as, has cosmetic skins and (in some seasons) tactical advantages, though the operative word is cosmetic in modern patches.
There are two primary resource types to understand: Cash (earned from opening contracts, defeating enemies, and looting supply boxes) and Loadout Tokens (found as loot or purchased with cash). Cash lets you buy killstreaks, UAVs, armor plates, and self-revives at buy stations scattered across the map. Loadout Tokens unlock your custom weapon builds, which are crucial because ground loot weapons lack the attachments needed for optimal performance. You start with 100 HP and can equip up to three armor plates (each adding 50 HP when activated, up to 200 total). Armor management is non-negotiable. Plates break on taking damage, so you’ll spend significant time re-plating during fights.
Game Modes And Match Types
Warzone isn’t just one playlist. Understanding the differences helps you practice the right skills and find your preferred pace.
Battle Royale Fundamentals
Standard Battle Royale (often called “BR”) is the classic format: 150 players, squad of 3 (or 2), last team standing wins. The gas circle follows a predictable pattern each match, creating a strategic layer where rotation timing and positioning matter as much as gunfights. Squads respawn via Gulag (a 1v1 prison fight) after first elimination if they win, but dying twice in the Gulag ends the round for that player unless a teammate grabs their dog tag and uses a SAM Turret or similar rare item to bring them back. Most beginner mistakes happen in early rotations when players panic-move toward the next circle instead of moving with intent.
The rhythm is: hot drop (contested landing spots with fast loot and early fights), medium drop (quieter areas with decent loot), or cold drop (far edges of the map with minimal loot but fewer enemies early). New players almost always hot drop, avoid this until your gunplay improves. Land medium or cold, farm kills against weaker opposition, build confidence, then graduate to contested zones.
Resurgence And Other Modes
Resurgence (if available in your region/season) is a smaller-scale BR with faster respawns and smaller team sizes (usually 2v2 or similar). It’s ideal for practicing gunfights without the 20-minute wait between matches. Some seasons also feature limited-time modes like “Solos,” “Duos,” or “Quads,” which change team composition but follow BR rules. Resurgence is criminally underrated for skill development because you fight more frequently and respawn rules keep matches competitive instead of decided by one bad early engagement.
Check your Call of Duty Warzone category for seasonal playlist updates, as available modes rotate with patches. Your region, platform, and current season determine what’s live.
Mastering The Loadout System
Your pre-match loadout is where Warzone separates casuals from competitors. Ground loot weapons (found during matches) are mostly handicaps early. They lack optimal attachments and compete against opponents using fully built loadout weapons. Your first priority after looting initial armor is acquiring a loadout token, heading to a buy station, and dropping your custom weapons.
Weapon Selection And Customization
Weapon meta shifts with patches, but the principle remains: primary weapon (AR, SMG, or sniper for close, medium, or long range), secondary weapon (often a different class covering another range), and a lethal/tactical equipment slot. Current meta (Season 1 2026) leans toward Assault Rifles for all-around dominance, SMGs for aggressive close-quarters, and Sniper Rifles for positioning-based play. Don’t chase the absolute meta gun if you haven’t unlocked attachments for it: use weapons you’ve leveled up in multiplayer.
Attachments dramatically shift weapon behavior. A Kar98k sniper with barrel extension and a scope becomes a long-range threat, while the same gun with a different scope setup becomes slower and clunkier. Resource pages like The Loadout publish weapon tier lists and meta builds: reference these instead of guessing. Your gun should match your playstyle: aggressive pushers favor SMGs and tactical rifles, patient players prefer snipers and ARs at range.
Customization happens in your weapons menu before the match starts. Create multiple loadouts so you’re not locked into one gun during the match. A loadout for aggressive early rotations differs from one designed for late-game 1v1s. Experiment in Resurgence first, where respawns let you test ideas quickly without 15-minute penalties.
Perks And Equipment Strategy
Perks come in three categories: Perk 1 (e.g., E.O.D. for explosive resistance, Quick Fix for healing), Perk 2 (e.g., Ghost to hide from UAVs, Spotter to reveal enemies), and Perk 3 (e.g., Tracker to see footsteps, Ammo Gremlin for ammo drops). Your perks should complement your weapon choice and playstyle. Aggressive players often pick Quick Fix + Ghost + Tracker. Defensive teams pick E.O.D. + Spotter + Ammo Gremlin.
Lethal equipment (grenades, C4, etc.) and Tactical equipment (stun grenades, smoke, etc.) round out your setup. C4 is hilariously overpowered in close quarters (throw, trigger immediately, instant kill). Stun Grenades shut down peek-heavy opponents. Thermite zips through armor. There’s no “best” choice: it depends on your expected engagement range and team composition. Discuss with your squad so you’re not duplicating grenades across all three players.
Landing Strategy And Early Game Tactics
The first 60 seconds of a Warzone match determine your foundation. Land in the wrong place or with the wrong priority, and you’ll spend the next 20 minutes grinding uphill.
Choosing Your Drop Location
The aircraft flies a predetermined path each match. Your squad communicates and marks a drop location before the plane reaches it. Three considerations: distance from the plane’s flight path (shorter = safer, longer = quieter), loot density (named locations = more loot, landmarks = less but sometimes undisturbed), and gas circle timing (if the first circle closes far north, landing south is bad). New players drop at “big” locations like Downtown, Verdansk, or similar marquee names because they’re familiar. This is a trap. You’ll spawn with 8-10 other squads, die in 90 seconds, and learn nothing.
Instead, drop at secondary locations: places with multiple buildings, decent loot, and typically 1-2 other squads. You’ll practice looting under light pressure, build confidence, and survive early engagements. Pro players call this “fighting for information”, you’re not trying to win: you’re learning the map, your guns, and how opponents move. After 20-30 matches at the same medium-tier location, you’ll know spawn patterns, rotations, and peek angles.
Consider your squad’s skill level too. Matchmaking (depending on your SBMM bracket) pairs you with teammates of varying ranks. If your squad are all new, avoid high-kill hot zones. If you’re the weak link on a veteran squad, play passive, gather info, and stay alive long enough to watch how they rotate and engage.
Looting Efficiently And Gathering Loot
Loot isn’t random. Each building type spawns specific items in the same locations. Supply drops are always on roofs or open ground. Weapon safes are in specific buildings. UAV terminals are in offices and control rooms. Learning these patterns cuts your search time in half.
Your priority: 1) Find a primary weapon quickly (any ground loot gun in a pinch), 2) grab armor plates (typically 2-3 before rotating), 3) find cash or contracts, 4) loot secondary weapons and equipment. If the circle is closing fast, ditch the thorough search. Grab a gun, armor, and move. Dead players loot nothing.
Contracts are the best early-game income. UAV contracts reveal player positions (massively valuable for rotations), Bounty contracts mark and pay you for killing specific targets, and Scavenger contracts point to hidden supply boxes. Grab a contract early, complete it while looting, and stockpile cash. By mid-game, you’ll have enough for a loadout token (around 7,000 cash) and a UAV (4,500 cash), which gives your squad incredible positioning data. Here’s where Call of Duty Spawn mechanics intersect with looting: knowing where enemies respawn in certain modes helps you anticipate rotations and avoid third-party wipes.
Combat Tips For New Players
Gunfights in Warzone differ from multiplayer. You have more health (shields/armor), limited ammo, and longer sight lines. Engagements favor patience and positioning over raw reflexes.
Gunplay And Aiming Techniques
Aiming in Warzone hinges on sensitivity settings and crosshair placement. High sensitivity lets you flick and track, but sacrifices precision at distance. Low sensitivity gives you sniper-level accuracy but feels sluggish in close quarters. Most professionals use medium sensitivity (around 5-7 on console, 1.5-2.5 sensitivity multiplier on mouse) and rely on aim-training routines to stay sharp. Sites like ProSettings aggregate pro player settings: use these as a baseline, not a bible.
Crosshair placement is the single biggest gap between beginner and intermediate players. Pre-aim where enemies’ heads will appear before you see them. If you’re peeking a corner, your crosshair should be at head height when you pivot. If you’re walking through a doorway, don’t stare at the floor: look where an enemy would stand. This habit alone doubles your time-to-kill (TTK) because you’re starting with a 0.1-second advantage.
Use cover aggressively. Never stand still in the open. Peek, shoot, retreat behind cover, re-plate if needed, and repeat. The player who takes less damage wins the fight. Headshots deal 1.25-1.5x damage depending on the gun: body shots are safer but slower. Against armored opponents (everyone has shields early), your first 3-4 shots break armor, your next 4-5 eliminate them. If you’re hitting legs or missing entirely, you’ll lose.
Recoil control is gun-specific. ARs climb vertically: SMGs spray horizontally: snipers have one shot so recoil doesn’t matter as much. Spend 10 minutes in a private match or multiplayer, firing each gun at a wall to learn its recoil pattern. Most pros use custom weapon builds that minimize recoil via barrel and grip attachments, which is why ground loot feels so much worse than your loadout weapon.
Movement And Positioning In Fights
Movement is where individual skill shines. Strafe side-to-side while aiming (called “strafing”) makes you harder to hit. Jump or slide when initiating a fight to break enemy aim. Bunny-hop (jump repeatedly while moving) to peek angles safely. Slide-cancel (slide, jump immediately after) to move faster without animation lockout. These aren’t exploits: they’re core movement mechanics that experienced players abuse relentlessly.
Positioning is your highest priority. A bad player with good position beats a good player with bad position. Good positions have multiple exits, cover between you and enemies, and high ground when possible. Bad positions have one exit, wide open lanes, and force you into direct gunfights. Always ask: “Can I be attacked from three directions here?” If yes, move. “Can I escape if I get rushed?” If no, reposition.
When fighting, strafe perpendicular to your enemy. If they’re north of you, strafe east-west, not toward them. Lean-peek (aim and look around corners without fully exposing your body) to gather intel before committing to a full peek. Stay within your weapon’s effective range. An SMG trying to beam someone 100 meters away will lose to an AR: an AR fighting at close range loses to an SMG. Your job is dictating engagement distance.
Team Coordination And Communication
Warzone punishes lone wolves. A squad working together beats three individuals with superior aim 90% of the time. Communication and coordination aren’t optional luxuries: they’re fundamental.
Using Pings And Call-Outs
Pinging is your non-verbal communication tool. Mark enemy positions, loot locations, and rotation paths. Use pings liberally. A quick “ping enemy building north” conveys more than typing or voice-chatting fumbling. Your ping shows on teammates’ minimap and in-world, making callouts instant and clear.
Verbal callouts should be specific. Instead of “enemy left,” say “one AR, crouching behind blue car, 50 meters north.” Include count (how many enemies), weapon type (AR, sniper, etc.), position (building name, landmark, direction), and distance if possible. This overhead decreases brain fog and lets teammates react faster. Use compass directions (north, east, south, west) or specific landmark names everyone knows. New players often call positions from their perspective (“left” to them might be right to a teammate across the map), creating confusion. Use absolute directions instead.
Call out rotations before moving: “pushing through warehouse, heading to the next circle.” Call out threats: “UAV incoming, take cover.” Call out loot: “sniper in this building, anyone need it?” Over-communication feels awkward your first 10 matches but becomes second nature. Teams that communicate constantly win matches they should lose.
Revive Mechanics And Respawn Strategies
When a teammate dies, their body drops with a revive timer (usually 30 seconds). Stand near them and hold the interact button (default is “Square” on console) to revive. Reviving takes 5-10 seconds and makes you vulnerable, so provide cover fire or secure the area first. Never blindly rush to revive a teammate in the open: you’ll just die next to them. If the area is too hot, fall back, reposition, and revive when safe.
Eliminated teammates drop dog tags (in some modes) or simply become spectators. The Gulag is a separate 1v1 fight that determines first respawn. Win your Gulag 1v1, and you respawn on the map. Lose it, and your teammate must grab your dog tag and spend cash or rare resources to bring you back, or you stay spectating. This means your first Gulag fight is crucial. Play passively, learn your opponent’s weapon, and look for mistakes rather than forcing aggressive plays. It’s a 1v1 in a tiny arena: patience and setup win more than rushing.
Second-round respawns (after Gulag) require your squad to earn cash or find respawn tokens scattered across the map. This creates tension: do you farm cash for a buy station respawn, or grab a rare respawn token if you spot one? Smart squads balance both. If a teammate dies mid-match, that’s typically permanent unless your squad coordinated backup plans or found respawn mechanics active that season.
Advanced Mechanics To Master Later
Once you’ve landed, survived, and won your first gunfight without panicking, these systems reward deeper understanding.
Money And Buy Stations
Cash is earned from opening contracts, defeating players, and looting supply boxes and eliminated enemies. Buy stations are scattered across the map (marked on your compass/map). Interact with one to purchase killstreaks (UAV, airstrike, precision airstrike), utilities (armor repair, self-revive, ammo crate), and team items (loadout drops). Prices vary, but essential items run 7,000 cash (loadout token) to 12,000 cash (precise airstrike).
Strategy: prioritize loadout tokens first (game-changing), then buy UAVs (reconnaissance is overpowered), then self-revives (squad durability). Self-revives are clutch in late-game 1v1s: down your opponent, self-revive, and finish them. Don’t waste cash on killstreaks early unless you’ve already secured loadout and UAV. Late game, a well-timed airstrike wins matches. Communicate with your squad about what to buy: three players burning 12,000 cash on airstrikes simultaneously is wasteful if the enemy squad has self-revives.
Contracts generate cash efficiently, but they reveal your position to other squads. Complete bounties and UAVs in safe zones, not in the open. Scavenger contracts point to supply boxes: grab the cash and move.
The Gas And Circle Management
The toxic gas circle shrinks predictably. Each wave of gas moves the safe zone, and players outside it take damage (starting at 5 HP/second, escalating with later circles). Your primary job is rotating into the safe zone before the gas touches you. Rotating early is defensive: rotating late is aggressive and risky. New players panic when the gas approaches and run mindlessly. Experienced players use rotations as ambush points, knowing other squads will funnel through the same corridors.
Circle timings are consistent per match but random in location. The first circle closes ~8 minutes into the match, giving you time to loot and fight locally. Later circles (5th+) are brutal: gas damage escalates, distances shrink, and engagements become frantic. Positioning and pre-positioning become everything. If the final circle is in a building, being inside that building 2-3 circles early is game-winning. If it closes in open terrain, height and cover matter more.
Gas provides cover. If enemies have you pinned, rotating through light gas (taking minimal damage) can force them to either follow and fight you on unfavorable terms or let you escape. Occasionally, squads pop a Gas Mask (protective equipment, not always available) to push through gas unharmed, so don’t assume gas is an automatic safe zone.
Understand your map’s geography. Know rotations from common hot-drop zones to the next likely circles. Rotate early, position for third-parties, and let the chaos unfold. Teams that rotate proactively control final zones: teams that rotate reactively get caught in unfavorable fights. For deeper dives into positioning and rotations, reference Twinfinite, which publishes map guides and rotation tips for current seasons. The Call of Duty Hueneme Negev is a weapon worth exploring after you’ve nailed fundamentals, and understanding weapon meta pairs with good positioning, a sniper with perfect positioning beats a well-tuned AR in the wrong spot.
Conclusion
Learning to play Call of Duty Warzone takes time. Your first 50 matches will feel chaotic, overwhelming, and demoralizing if you expect instant competence. That’s normal. Focus on one or two concepts per session: drop location and looting, then gunplay, then rotations. Mastering fundamentals, landing safely, securing loadouts, and positioning smartly, beats mechanical skill every single time. A mediocre aimer with perfect positioning and callouts outperforms a godlike twitch player who runs blindly into fights.
Stick with the same squad, same weapons, and same landing spots until they feel automatic. Repetition builds muscle memory and game sense. Watch your own replays to identify mistakes. Did you get third-partied? Your rotation was predictable. Did you lose a gunfight you should win? Your positioning was bad. Did your squad miscommunicate? Make callouts clearer. Improvement compounds: small gains each session add up to massive leaps in 100 hours.
Warzone patches shift meta constantly. Weapon balance changes, new mechanics emerge, and seasons introduce fresh systems. Stay current by following patch notes and checking your preferred community resources regularly. The fundamentals, land smart, loot fast, communicate clearly, position well, and win gunfights, remain constant. Master those, and you’ll thrive regardless of which gun is meta or what map is live.