


Table of Contents
ToggleCall Of Duty Modern Warfare 3 remains one of the most competitive shooters on the market, and if you’re serious about climbing the leaderboards, you need more than raw aim. The gap between casual players and those who dominate multiplayer comes down to understanding the small, deliberate optimizations, the “hacks” that separate veterans from the rest. These aren’t exploits or cheating software: they’re legitimate strategies, settings tweaks, and tactical knowledge that turn average players into force multipliers. Whether you’re grinding ranked play or chasing high K/D ratios in public matches, this guide covers the advanced Call Of Duty Modern Warfare 3 hacks that actually matter in 2026.
Key Takeaways
- Call of Duty Modern Warfare 3 hacks are legitimate strategies—map knowledge, sensitivity tuning, and loadout optimization—that separate competitive players from casual ones without requiring cheats.
- Optimize your sensitivity settings (10-12 for controllers, 400-800 DPI for mouse) and practice crosshair placement daily to reduce reaction time and improve accuracy across engagements.
- Master map control by understanding spawn rotations, holding high-value sightlines that reveal 40% of the map, and predicting enemy positions based on team positioning.
- Build meta loadouts around weapons like the XM4 Assault Rifle and GPMG-7 SMG, but experiment with underrated weapons to exploit predictable player behavior and gain a competitive advantage.
- Use audio as a competitive edge by listening for footstep patterns, activating HRTF audio settings, and communicating enemy positions with teammates to win close engagements.
- Maintain a wired connection below 80ms ping, enable 120+ FPS on consoles, and disable motion blur and ray tracing to ensure stable frame rates and reliable hit registration in ranked play.
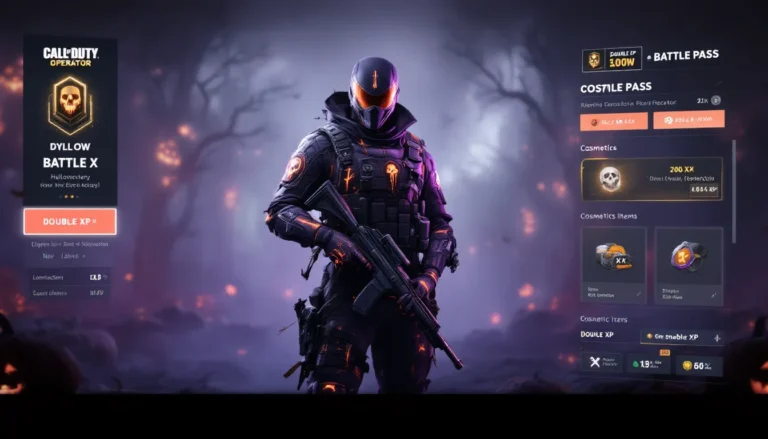
What Are Call Of Duty Modern Warfare 3 Hacks?
In the gaming world, “hacks” mean different things depending on context. For Call Of Duty Modern Warfare 3, the hacks that matter are legitimate techniques, map knowledge, loadout optimization, settings configuration, and situational awareness, that give you a competitive edge. They’re not cheating software that gets you banned: they’re knowledge-based advantages that any player can carry out today.
Legitimate Gameplay Exploits vs. Cheating Software
There’s a critical distinction here, and it matters legally and ethically. Legitimate gameplay exploits are techniques within the game’s normal mechanics that smart players leverage: knowing spawn rotations, positioning around sightlines, understanding how TTK (time-to-kill) works with certain loadouts, and predicting enemy movement patterns. These come from thousands of hours of gameplay and map study.
Cheating software, aimbots, wallhacks, radar hacks, lag switches, directly violates the game’s terms of service and Activision’s strict anti-cheat system. The consequences are permanent bans, lost accounts, and wasted money on skins and the battle pass. Activision’s Ricochet anti-cheat has gotten significantly more aggressive in 2026, with detection rates near real-time for hardware bans. It’s simply not worth the risk, and honestly, the skill ceiling in Modern Warfare 3 is so high that legitimate hacks beat cheaters in most competitive scenarios anyway.
This guide focuses entirely on the legitimate side, the strategies, settings, and knowledge that transform how you play.
Advanced Aiming & Sensitivity Settings
Your aim settings are the foundation of everything else. Countless players play on default or near-default sensitivity, and it directly limits their ceiling. Pro players don’t just “have better aim”, they’ve optimized their sensitivity curve, deadzone settings, and ADS multipliers to match their playstyle and hardware.
Controller & Mouse Optimization
**For Controller (Console – PS5 / Xbox Series X
|
S):**
- Horizontal & Vertical Sensitivity: 10-12 range for most aggressive players: 8-10 if you prefer precision. The meta has shifted toward higher sens in 2026 due to faster TTK weapons.
- ADS Sensitivity Multiplier: 0.9-1.0. This controls how your sensitivity changes when aiming down sights. Most competitive players use 0.95, balancing snap-on speed with tracking accuracy.
- Deadzone (Aim Assist & Movement): Keep both at 0.05-0.08. Lower deadzone = faster response, higher deadzone = less drift. Experiment for 30 minutes in private matches to find your sweet spot.
- Aim Assist Type: Focusing is standard for multiplayer: Slowdown is outdated. Switch to Focusing if you’re still using Slowdown.
- Controller Vibration: Disable it in competitive modes. Vibration feedback masks subtle aiming adjustments.
For Mouse & Keyboard (PC):
- DPI + In-Game Sensitivity: Pro settings hover around 400-800 DPI with in-game sensitivity 5-8, yielding an effective sensitivity of 2000-6400 eDPI. The specifics depend on your mousepad size and preference. Larger mousepad = lower DPI is generally better for sustained accuracy.
- Mouse Acceleration: Disabled. Period. Acceleration throws off muscle memory.
- Raw Input: Enabled. This bypasses OS mouse acceleration settings.
- Polling Rate: 1000Hz minimum. Your mouse should support at least 1000Hz polling for competitive play.
Pro players from ProSettings typically use ergonomic mice with 16,000 DPI capability and validate settings in offline aim trainers before ranked matches.
Crosshair Placement Techniques
Crosshair placement is where aim becomes muscle memory. Pre-aiming common angles before you see an enemy cuts your reaction time from 200ms to near-zero.
Pre-aiming Methodology:
- Before peeking a corner, position your crosshair at head-height where enemies typically appear. If an enemy spawns there, you’re already on them.
- High-traffic areas (doorways, long sightlines, objective points) deserve the most attention. Spend your mental energy there.
- When holding an angle defensively, keep your crosshair slightly offset from the corner (about 6 inches on your monitor). This accounts for peeker’s advantage and latency.
- Practice “lazy aiming”, minimal crosshair movement during engagements. The less you move your aim, the more consistent you are. Rely on strafing instead of jerky aim adjustments.
Spend 5-10 minutes daily in private matches or aim trainers on these scenarios. Crosshair discipline separates 2.0+ K/D players from 1.2 K/D players more than raw sensitivity ever will.
Map Knowledge & Positioning Secrets
Modern Warfare 3’s multiplayer maps reward players who memorize spawn logic, high-value real estate, and sightline control. New players die repeatedly to the same angles: map experts set up ambushes before enemies spawn.
Spawn Point Prediction
Every multiplayer map follows spawn rules. When you control the map, enemies spawn in predictable locations. When you’re spawned, you’re vulnerable for 2 seconds, enemies routinely spawn-camp with Call of Duty Night Vision Goggles or high-damage loadouts waiting at spawn exits.
Spawn Logic Breakdown:
- Spawns avoid direct lines of sight to multiple enemies. If three enemies hold a central position, the team spawns at the opposite end.
- Team Deathmatch spawns rotate roughly every 15-20 seconds based on map control. Whoever holds the center controls spawns.
- Kill Confirmed and Domination have anchor spawns near flags. Capturing flags flips spawns, understanding this timing prevents you from getting pinned.
- Never camp the same spawn exit twice. Enemies adapt within seconds and will prefire your position.
Study the map’s spawn layout in custom games. Understand which team controls which side and watch killcams to identify spawn flips. After 20-30 matches on a single map, spawn prediction becomes second nature.
High-Value Sightline Control
Every map has 3-5 positions where one player can see (and threaten) 40% of the map. Hold these positions and you rack up kills: ignore them and you feed.
Sightline Control Checklist:
- Center of the map: Whoever controls mid-map controls everything. On Rust, the center platform. On Derail, the main bridge.
- Elevated positions: Rooftops and balconies extend sightlines. They’re vulnerable to grenades but offer clear views.
- Chokepoint areas: Doorways, narrow hallways, and cover clusters force enemies into your field of fire. Position perpendicular to traffic, not directly in the path.
- Objective locations: In Domination, holding the “B flag area” sightline denies the enemy team two flags simultaneously.
The Loadout frequently updates competitive sightline guides per season patch. The meta sightlines shift slightly with balance changes, so reference their loadout builds when a new season drops.
Loadout Configuration & Weapon Hacks
Your loadout is your toolkit. The meta in Modern Warfare 3 has stabilized around a few core weapons, but understanding why they dominate and how to build them unlocks significant advantages.
Meta Weapon Builds For Competitive Play
Current Meta Tier (Season 2 / 2026):
- XM4 Assault Rifle: Best all-rounder. TTK of ~300ms at range. Build for accuracy, Agency Suppressor, VLK Lightweight Stock, Slate Reflector optic. Recoil control is essential: practice burst-firing at distance.
- GPMG-7 SMG: Dominates close quarters. TTK under 150ms. Close-range multiplayer is SMG territory. Build: Infiltrator Grip, Lightweight Stock, FTAC Champion optic.
- LW3A1 Frostline Sniper: One-shot potential with mobility. No ADS slowdown with the right build. Quickscope loadout uses Lightweight Stock, Slate Reflector, and lightweight perks. Quickscoping is back in 2026.
- M16 Burst Rifle: Three-round burst with minimal recoil. Competes with XM4 in skilled hands. Build for stability: Commando Foregrip, VLK Lightweight Stock, Agency Suppressor.
Loadout Structure:
- Weapon: Primary (rifler/SMG/Sniper depending on map).
- Optic: Slate Reflector (versatile, minimal glint) or FTAC Champion for close-range SMG.
- Underbarrel: Commando Foregrip (recoil control) or Infiltrator Grip (handling).
- Magazine: Appropriate capacity: don’t use extended mags on weapons that already reload fast (wastes slot).
- Stock: VLK Lightweight Stock (universally meta for mobility).
- Perks: Double Time (movement speed), Cold Blooded (thermal/UAV immunity), High Alert (see enemies looking at you).
- Lethal: Frag Grenade (versatile), Thermite (zone denial).
- Tactical: Flash Grenade (enable pushes), Stun Grenade (disable enemy aim).
- Scorestreak: UAV (constant intel), CUAV (counter enemy UAV), Advanced UAV (overwatch asset).
Theory crafting changes with patches. When Activision buffs a weapon, the meta shifts. Reference Dexerto for patch breakdowns and updated meta tier lists weekly.
Underrated Weapon Combinations
The meta is tight, but certain underused weapons punish predictable players.
- Jackal PDW (SMG): Lower TTK than GPMG-7 at extreme close range (sub-5m). If your playstyle involves aggressive rushing and map control, Jackal PDW with Lightweight Stock and Sleight of Hand perk outputs insane DPS.
- LW3A1 Frostline (One-shot sniper): Snipers fell out of favor in casual play, but in skilled hands, a quickscope setup beats SMG pushes. Learn quickscoping and you’ll instantly outgun half your lobbies.
- M13B Rifle: Underrated medium-range weapon. Better horizontal recoil control than XM4: less vertical kick. For players who struggle with recoil, M13B offers consistency over raw TTK.
Experiment in multiplayer. If you’re consistently out-gunned by a specific weapon, test a loadout built around it. Many players avoid certain weapons due to perception, not actual balance, exploit that.
Tactical Equipment & Scorestreak Strategies
Equipment and scorestreaks account for roughly 25-30% of your kills in a match. Smart placement of grenades and timing your scorestreaks transforms momentum shifts.
Optimal Equipment Selection
Lethal Grenades:
- Frag Grenade: Covers the most scenarios. Pre-throw into common positions before engaging. Throw timing: release and count “1-2” before impact for predictable timing.
- Thermite: Denies areas. Plant near doorways, objective sites, or escape routes. Enemies rarely push through Thermite: you get free time to reposition.
- C4: Mobile and reactive. Hold C4, push an enemy, detonate mid-fight. High skill ceiling: pairs well with aggressive playstyles.
Tactical Equipment:
- Flash Grenade: Enables aggressive pushes. Blind an angle, rush in before enemies recover vision (roughly 1.5 seconds). Combo with SMG for devastating effect.
- Stun Grenade: Disables enemy aim assist and increases sensitivity randomly. Use before objective plays (planting bomb, capturing flags).
- Snapshot Grenade: Reveals enemy position for 6 seconds. Reconnaissance tool, throw before entering contested areas.
Placement matters more than spam. Throwing grenades without purpose is wasted cooldown. Pre-aim the trajectory based on where enemies typically stand. After 5-10 maps, grenade lineups become muscle memory.
Scorestreak Callout & Timing
Scorestreaks reward consistent play and deny the enemy team momentum. Scorestreaks (not killstreaks) reset on death, so even 5-kill streaks contribute.
Fundamental Scorestreaks:
- UAV (4 Scorestreak): Most efficient intel tool. Call it early: it doesn’t cost much but reveals the entire enemy team for 30 seconds. Stack multiple UAVs if your team allows.
- CUAV (5 Scorestreak): Counter-Intel. Jams enemy radar and reveals their location when they use killstreaks. Essential response to enemy UAV spam.
- Advanced UAV (12 Scorestreak): Game-changer. Shows enemy names, direction, and loadouts for 30 seconds. In Domination, this wins map control. Save for critical moments (around flag captures).
- Cruise Missile (7 Scorestreak): Manually guided nuke. Effective in Domination around objectives. Not reliable in TDM (too many escape routes).
- Chopper Gunner (10 Scorestreak): Sustained fire from above. Controls the map for 30 seconds. Call it before pushing an objective.
Timing Strategy:
- Call UAV immediately when available (no downside).
- Save Advanced UAV for when you’re pushing an objective (Domination) or contesting a high-value area.
- If the enemy team is already on a killstreak, don’t waste advanced kills on passive streaks. Push aggressively to reset their momentum.
- Predict enemy scorestreaks and use your own streaks to counter them. Enemy Chopper Gunner active? Stack air support yourself to deny their line of sight.
Multiplayer Mode-Specific Tactics
Different modes reward different strategies. A dominant TDM player might struggle in Search & Destroy: a Domination specialist might flounder in Free-For-All. Master mode-specific fundamentals and you’ll rank up faster.
Team Deathmatch & Free-For-All Strategies
Team Deathmatch (TDM):
- Spawning Strategy: Map control determines spawns. High team K/D doesn’t mean your team controls spawns, positioning does. If your team holds the center, enemies spawn perimeter. Defend the center: push their spawn.
- Death Economy: In TDM, every death counts as +1 to enemy score. Avoid risky peaks: only engage when you have positional advantage. A 15-8 record beats a 25-20 record (same K/D, fewer deaths = fewer enemy points).
- Objective Control: TDM has no objective, so pure gunplay dominates. Master sightlines, pre-aim, and crosshair placement above everything else. Spray and pray loses to disciplined aim.
Free-For-All (FFA):
- Isolation: You can’t rely on teammates. Every player is an enemy. Play passive, hunt isolated targets, and avoid multi-player engagements where you’re outnumbered.
- Position Rotation: Stay away from the center (most contested). Hold edges and secondary sightlines. Let the map pressure push enemies toward your position.
- Spawn Awareness: FFA spawns scatter players across the map to avoid instant deaths. Use this to your advantage, know where spawns occur and farm new spawns cautiously.
- Streak Discipline: Scorestreaks are more valuable in FFA (no teammates to steal kills). Save them for pivotal moments: don’t waste on passive play.
Objective Game Modes: Domination, Search & Destroy
Domination (6v6, three flags):
- Flag Roles: A and C (team spawns) are easier to hold. B (center) is contested. Map control around B determines the match. Secure B first, then one additional flag (A or C). 2-flag control wins 90% of Domination matches.
- Holding vs. Pushing: Dedicate 2-3 players to hold flags: 2-3 rotate to support. Never leave a flag undefended. One unchecked enemy costs you 10 points/tick.
- Objective Awareness: Play around flag locations. Your radar shows flag position: use it. If B flag is active, position yourself with sightlines to the flag entrance. Pre-aim angles where enemies push.
- Scorestreak Priority: Call UAV early and often. Advanced UAV during flag captures. In Domination, intel directly translates to flag control.
Search & Destroy (4v4, one bomb plant):
- Role Assignment: Designate a planter, a lurker (flanker), and three hold players. Planter has bomb: lurker plays off-meta positions to catch rotates: hold players anchor the site.
- Anti-Eco / Full Buy: Buy accordingly. If your team loses pistol round, don’t full-buy next round, force buy or eco. Economy management is half the game.
- Communication: Call positions, enemy locations, and rotates constantly. Without comms, S&D is nearly unwinnable. Use in-game voice or Discord.
- Post-Plant Anchor: After bomb plant, the team spreads to cover flanks. Defenders rush the bomb site: your job is to delay and pick isolated targets, not challenge a 5v4 directly.
Modes teach different skills. TDM sharpens raw aim: Domination teaches map control: Search & Destroy teaches economy and team coordination. Grinding all three modes makes you a complete player.
Audio Cues & Sound Strategy
Audio is often underrated in FPS games, but competitive players treat sound as a third eye. Footsteps, weapon audio, and ambient cues reveal enemy position and intent before you see them visually.
Using Headsets To Your Advantage
Audio design in Modern Warfare 3 is detailed. Every weapon has a distinct sound signature: footsteps vary by surface (metal, wood, concrete): tactical equipment has audio cues.
Headset Quality:
- Open-back or semi-open headsets (like HyperX Cloud Stinger or SteelSeries Arctis) provide better spatial audio and allow you to hear ambient game sound without losing awareness of your surroundings (relevant for LAN events).
- Closed-back headsets (SteelSeries Arctis Nova, HyperX Cloud 2) isolate sound, ideal for home play.
- Directional audio matters. Position the headset properly so left-side audio clearly comes from the left channel and right-side from the right.
- Avoid noise-cancelling during competitive play, it muffles critical in-game audio.
Audio Settings Optimization:
- Set in-game audio output to “Headphones” (not “Stereo”). This activates HRTF (Head-Related Transfer Function), improving spatial awareness.
- Master Volume: 80% (100% distorts). Dialogue and effects should be clear, not clipped.
- Weapon Audio: Full volume. Detect enemies by gunfire direction.
- Footsteps: Full volume. Footsteps are your primary early-warning system.
Footstep Prediction & Enemy Detection
Footsteps are louder in Modern Warfare 3 than previous titles. A player sprinting toward you generates audible footsteps from roughly 20 meters away (depending on surface).
Footstep Patterns:
- Sprint Footsteps: Rapid, heavy, distinctive. Indicates an aggressive push. Enemy is 5-15 meters away and moving fast.
- Walking Footsteps: Slower, lighter. Stealthy approach. Enemy is probably pre-aiming or hunting a specific angle.
- Crouch Walking: Minimal audio. Dangerous: enemy is very close (5 meters or less) and likely setup for a trade.
- Slide: Whoosh sound followed by movement. Enemy is repositioning aggressively. Expect a push immediately after.
Tactical Audio Usage:
- Listen for footsteps before peeking. If you hear an enemy approaching, pre-aim their likely path.
- Use silence to your advantage. If footsteps stop, the enemy has stopped moving. They’re setup, probably aiming. Don’t blindly peek.
- Audio callouts in team modes: “Footsteps left”, “behind you”, “rotating to B” are essential. Teammates with headsets react faster.
- Surface audio clues: Concrete footsteps are louder than wood. Metal surfaces (Rust) have distinct audio signatures. Learn the map’s audio geography.
Pro teams (Dexerto features pro interviews regularly) emphasize audio communication and footstep listening. They call positions by audio alone during intense moments. Audio discipline wins close engagements.
Common Mistakes To Avoid
Identifying what NOT to do accelerates improvement. These are the most common mistakes holding back average players.
Why Cheating Software Ruins Your Game
Beyond the moral and legal implications, cheating software is strategically ineffective in modern Call Of Duty. Activision’s Ricochet anti-cheat system uses kernel-level detection, meaning it monitors your PC’s hardware directly. Detection is nearly instant for aimbots and wallhacks, resulting in permanent hardware bans, your entire system gets flagged, not just the account.
Real-World Consequences:
- Permanent ban from Call Of Duty (all titles), Warzone, and linked Activision accounts.
- Hardware ban: Your GPU and motherboard serial numbers are flagged. You can’t play on that system, even with a new account.
- Lost cosmetics, battle pass progress, and any purchased content.
- Competitive ban from esports tournaments (if you had aspirations there).
- Social stigma, leaked accounts and forum callouts permanently taint your reputation.
Why It Doesn’t Even Help:
- Modern Warfare 3’s meta rewards positioning and map knowledge, not raw aim. A cheater with no game sense gets destroyed by experienced players who know sightlines.
- Wallhacks don’t prevent you from making tactical mistakes. You still get caught in bad rotations, waste scorestreaks, and lose fights due to poor crosshair placement.
- Aimbots don’t teach you recoil control. Legends Warzone pros disabled aim assist to prove their skill: they still dunk on aimbotters consistently.
Invest in legitimate improvement. Spend 100 hours learning maps and sens tuning, and you’ll dominate players with cheats installed. The legitimate path is faster and risk-free.
Other Common Mistakes:
- Playing on default settings: Sensitivity, deadzone, and ADS multiplier directly impact your ceiling. Optimize them in the first hour of play.
- Ignoring audio: Muting chat or using bad headsets removes critical intel. Footsteps and teammate callouts win fights.
- Tunnel vision on kills: Some players chase kills and ignore objective play. In Domination, capturing flags > killing. In S&D, planting the bomb > frags.
- Predictable patterns: Peaking the same angle twice gets you killed twice. Vary your rotations and angles.
- Neglecting aim training: 10 minutes daily in aim trainers (Aim Lab, KovakFPS) with Modern Warfare 3 aim trainer maps accelerates improvement by weeks. Most players skip this.
- Spam playing without review: If you lose 5 consecutive matches, stop and review killcams. Identify your mistake (positioning, sensitivity, loadout). Don’t grind mindlessly.
Performance & Network Optimization
Even perfect aim doesn’t matter if your connection is unstable or your frame rate stutters. Network and graphics settings are often overlooked but directly impact competitive viability.
Lag Compensation & Connection Stability
Modern Warfare 3 uses client-side hit detection with server-side validation. This means your client determines hits locally, then the server confirms. High latency creates mismatches where you see a hit that the server doesn’t register.
Latency Targets:
- Optimal: 0-40ms ping. You’re ahead of the server: peeker’s advantage is yours.
- Good: 40-80ms ping. Competitive range. Latency is noticeable but manageable with prediction.
- Acceptable: 80-120ms ping. High latency compensation is active. Difficult for precise aim.
- Bad: 120ms+. Desyncs occur: hit registration is unreliable. Avoid ranked play above this.
Connection Stability Checklist:
- Wired Connection (Ethernet): Mandatory for competitive play. WiFi has latency variance (jitter), which is worse than high stable ping. Jitter of ±20ms makes hit registration unreliable.
- ISP/Router Firmware: Update your router firmware monthly. Old firmware causes packet loss and connection drops.
- Bandwidth: Minimum 10 Mbps download, 2 Mbps upload for stable Modern Warfare 3 play. If others are streaming/downloading, lag spikes occur. Prioritize your gaming device in QoS settings.
- DNS: Use Cloudflare (1.1.1.1) or Google DNS (8.8.8.8) instead of ISP defaults. Faster DNS resolution = faster connection establishment.
If you’re consistently above 100ms ping, network upgrade or ISP change is necessary before you’ll see rank improvement. Connection is foundational.
Graphics Settings For Competitive Advantage
Frame rate, field of view, and visual clarity directly impact competitive performance. Higher frame rates give you more frequent screen updates, making aim smoother. Graphics settings determine visual clarity, seeing enemies clearly beats seeing them blurry.
Monitor & Frame Rate:
- Target 120+ FPS for competitive play on PC. 60 FPS (console default) is playable but disadvantageous. PS5 and Xbox Series X both support 120 FPS modes: enable them.
- Monitor refresh rate matters. 60Hz monitor can’t display 120 FPS (wasted frames). Upgrade to 144Hz or 240Hz for competitive PC play. Call of Duty for PS5 typically runs 120 FPS at 1440p with proper settings tuning.
- Frame rate consistency > raw frame rate. 120 FPS constant beats 200+ FPS with stutters. Adjust graphics settings to maintain stable frame rates.
Video Settings (PC):
- Resolution: 1920×1080 (1080p). Standard for competitive gaming. Higher resolution (1440p, 4K) adds visual detail but tanks frame rate.
- FOV (Field of View): 110-120. Wider FOV shows more of the map but can feel distorted. Start at 110, adjust based on preference.
- Motion Blur: Disabled. Motion blur obscures details during fast movement.
- Ray Tracing: Disabled in competitive play. Ray tracing tanks frame rate and provides minimal competitive advantage.
- Texture Quality: High (not Ultra). Ultra adds minimal visual improvement but costs 10-15 FPS.
- Shadow Quality: Medium. Low shadows make dark areas harder to spot enemies: high shadows cost FPS. Medium is the balance.
- Draw Distance: High. Seeing distant enemies matters in long-range engagements.
Console (PS5 / Xbox Series X):
- Performance Mode (120 FPS @ 1440p): Use this. 120 FPS advantage outweighs visual detail.
- Brightness/Contrast: Set to 50/50 as baseline. Adjust until you can see enemies in dark corners (buildings, shadows) without overexposing bright areas.
Call of Duty Cold War PS4 and Modern Warfare 3 both support 120 FPS on current-gen console if you have a TV/monitor capable of 120Hz refresh. Verify your display’s specs.
Optimized graphics settings are the difference between 150 FPS constant and 120 FPS with frame drops. Stability matters more than peak numbers. Test settings in custom matches before ranked play.
Conclusion
Call Of Duty Modern Warfare 3 dominance doesn’t come from gimmicks or exploits, it comes from deliberately optimizing every variable under your control. Sensitivity tuning, map knowledge, loadout theory-crafting, audio discipline, and network stability aren’t flashy hacks, but they’re the actual separators between average and elite players.
Start with one change: optimize your sensitivity settings today, practice crosshair placement for 15 minutes tomorrow, and study your main map’s spawn rotations this week. Compound small improvements weekly, and you’ll move from 1.0 K/D to 2.0+ within a season. The hacks aren’t secrets, they’re just consistency and deliberate practice that most players skip.
The path to dominance is visible. Whether you walk it depends on whether you’re willing to put in the work that 99% of casual players avoid.